
Greylord Behind-the-Scenes Process
Originally published April 11, 2016
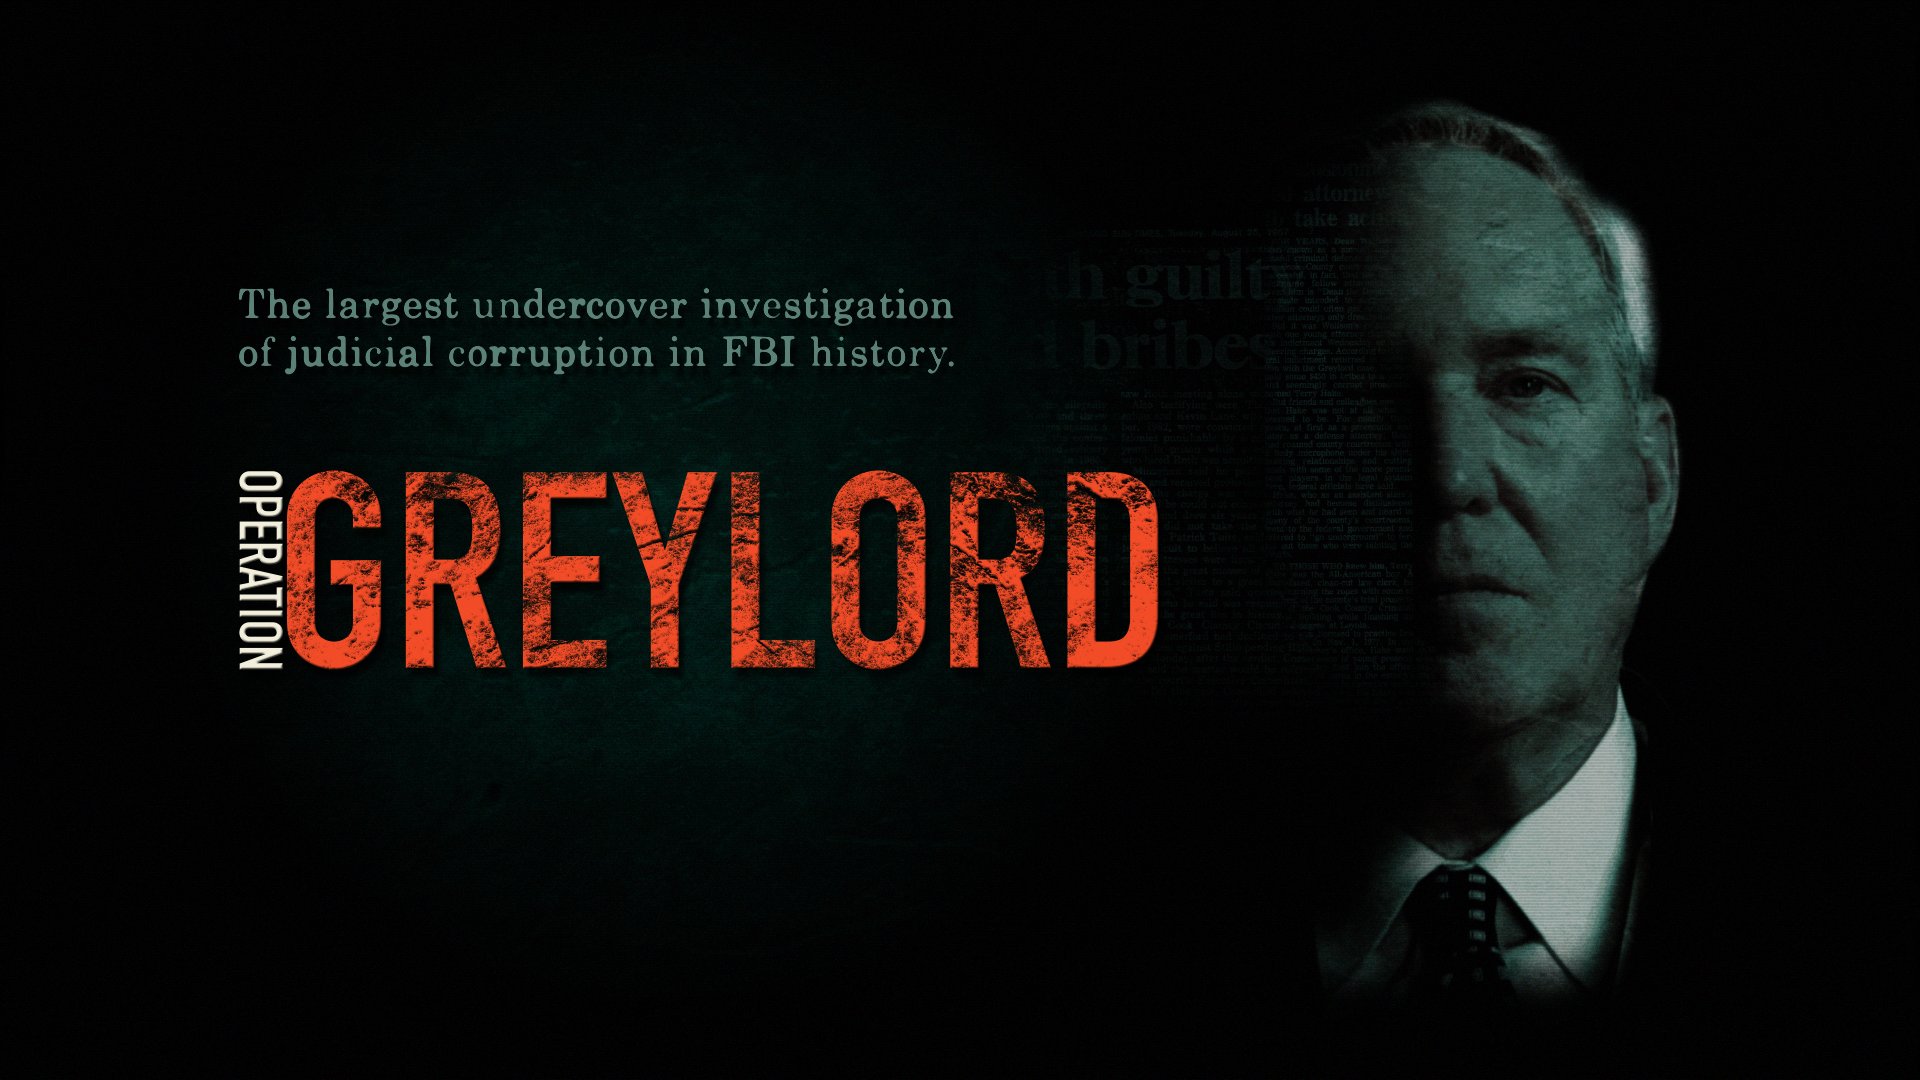
Greylord is a collaboration with the Decades channel. It's the first of its kind on the channel, a 30-minute standalone documentary about one single event in history. Myself and co-director Billy Miossi explored Greylord, one of the largest FBI sting operations in history, designed to uncover corruption in the Chicago judicial system spanning more than 10 years in the late 70's and early 80's.
We were tasked with coming up with a way of making a story about court testimony entertaining and exciting, and somehow turning 11 interviews into one cohesive 30 minute documentary. Below I'm going to talk about the process that I designed to keep things interesting and moving, while supporting the story and making sure the audience would be able to understand the complex information delivered in the interviews.
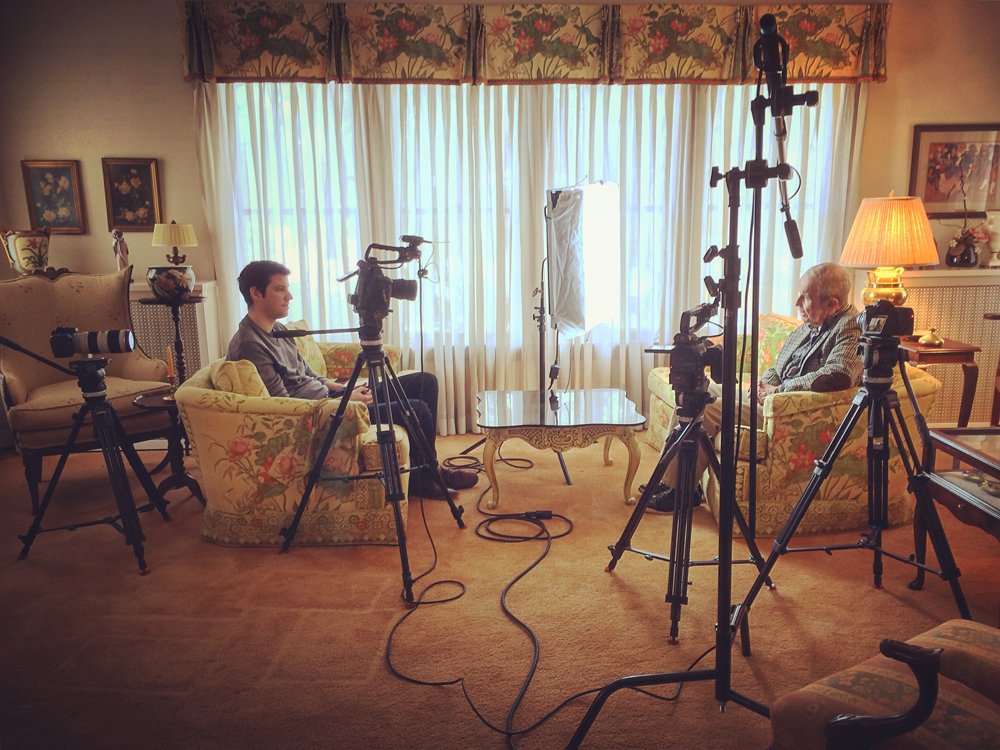
The first thing we did was schedule interviews with all of the major players in the investigation. Going into it, we knew that we had a huge lineup of interviews for such a short project, and I didn't want to get stuck hanging onto a single interview shot for long periods of time if we couldn't find a visual way to support the story, so I opted for a 4-camera interview setup.
Normally I'd stick to a 2-camera setup, but in this case I knew that we had to punctuate story beats, and in most cases, rearrange some of what was said so that it could be as short and condensed as possible. This meant lots of editing, and with lots of edits, having more camera angles to cut between can make all the difference in something feeling contrived vs. just feeling fast paced.
Here is what our 4-camera interview setup looked like on John Drummond, a reporter from CBS News in the 1980's.
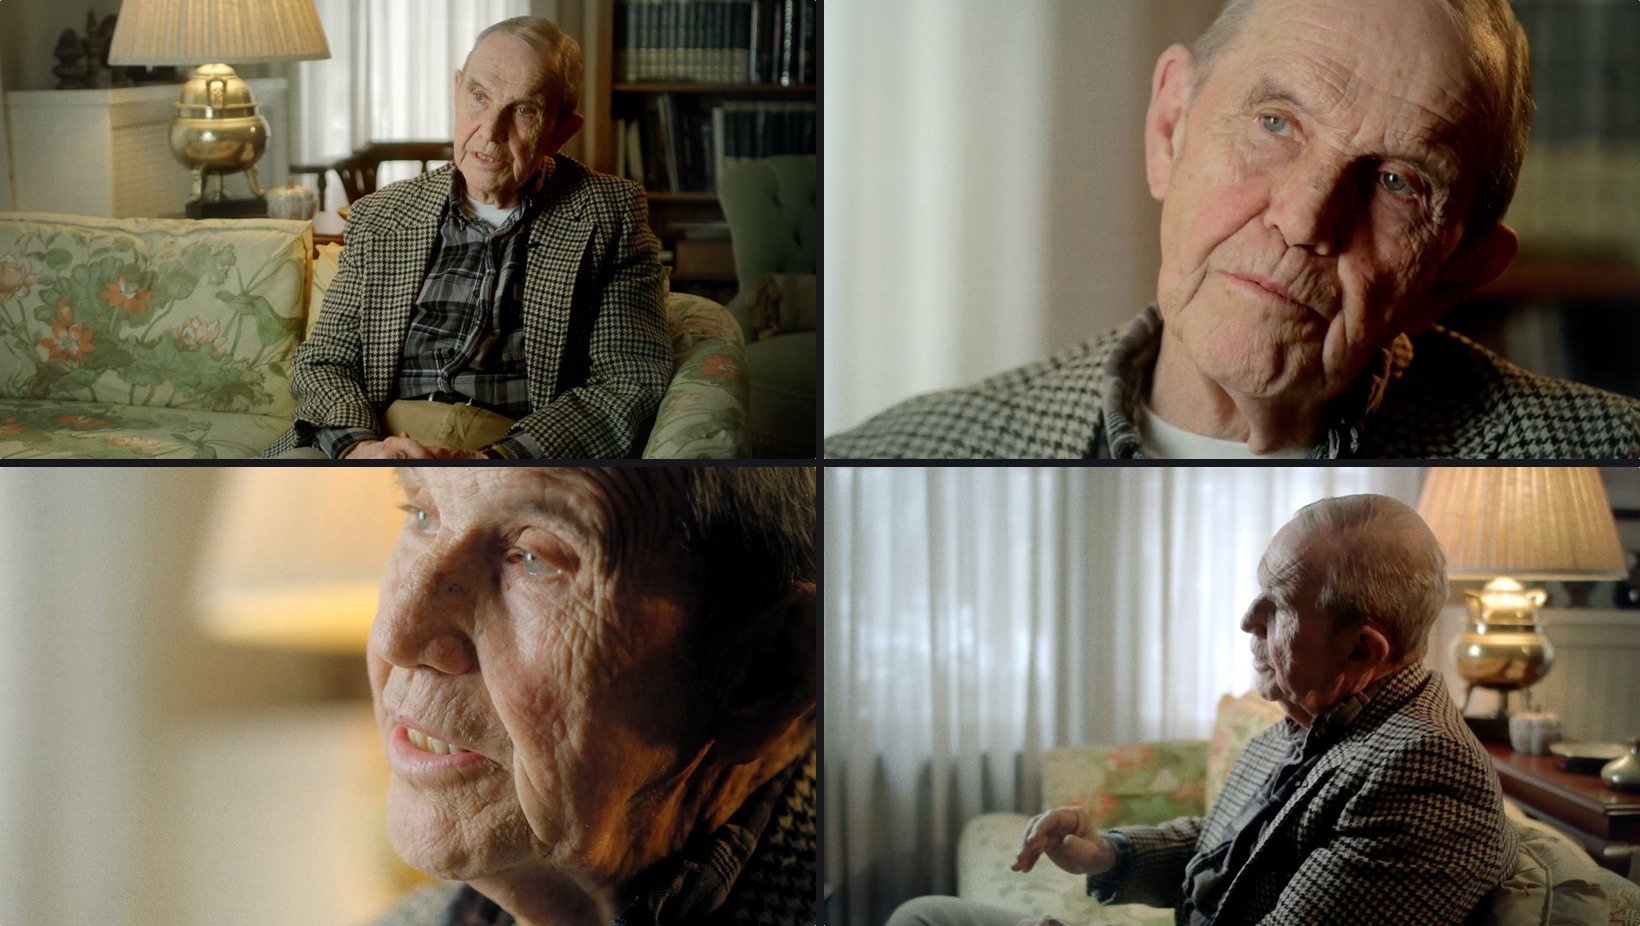
When I do large camera setups for interviews, I always have one camera that is slightly off-putting, meaning it's not a traditional angle, it feels odd, it's a little jarring. This angle is something you could cut to if you need to set up the audience to feel like what the person is saying carries a little more weight.
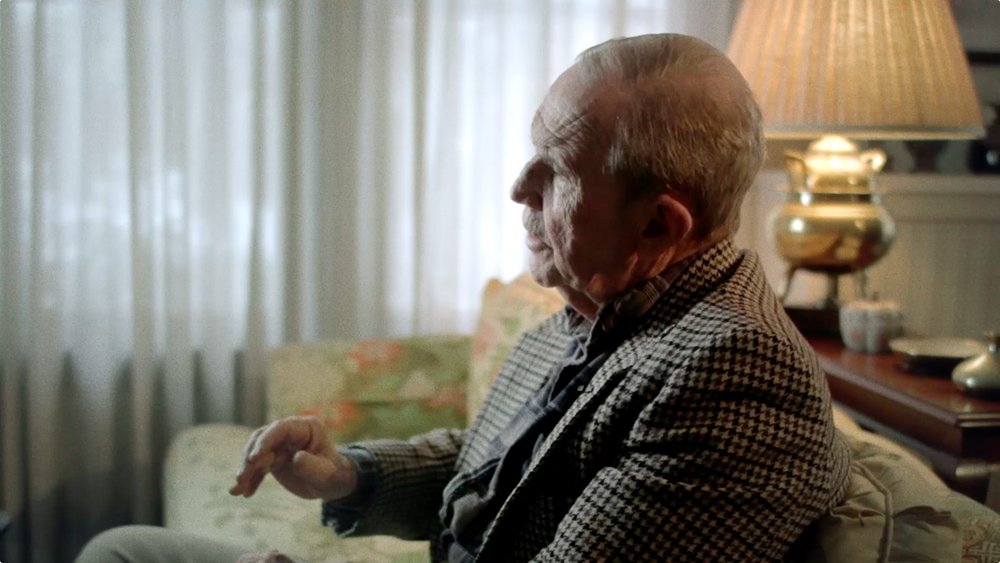
We would cut to this angle for punctuation. Drummond was a very vibrant character, he was loud and animated and fun to put on camera, and this angle does a great job of supporting his manic actions, whether it was a frenetic hand movement, or a loud clap.
This is a look at our setup with Drummond at his house:
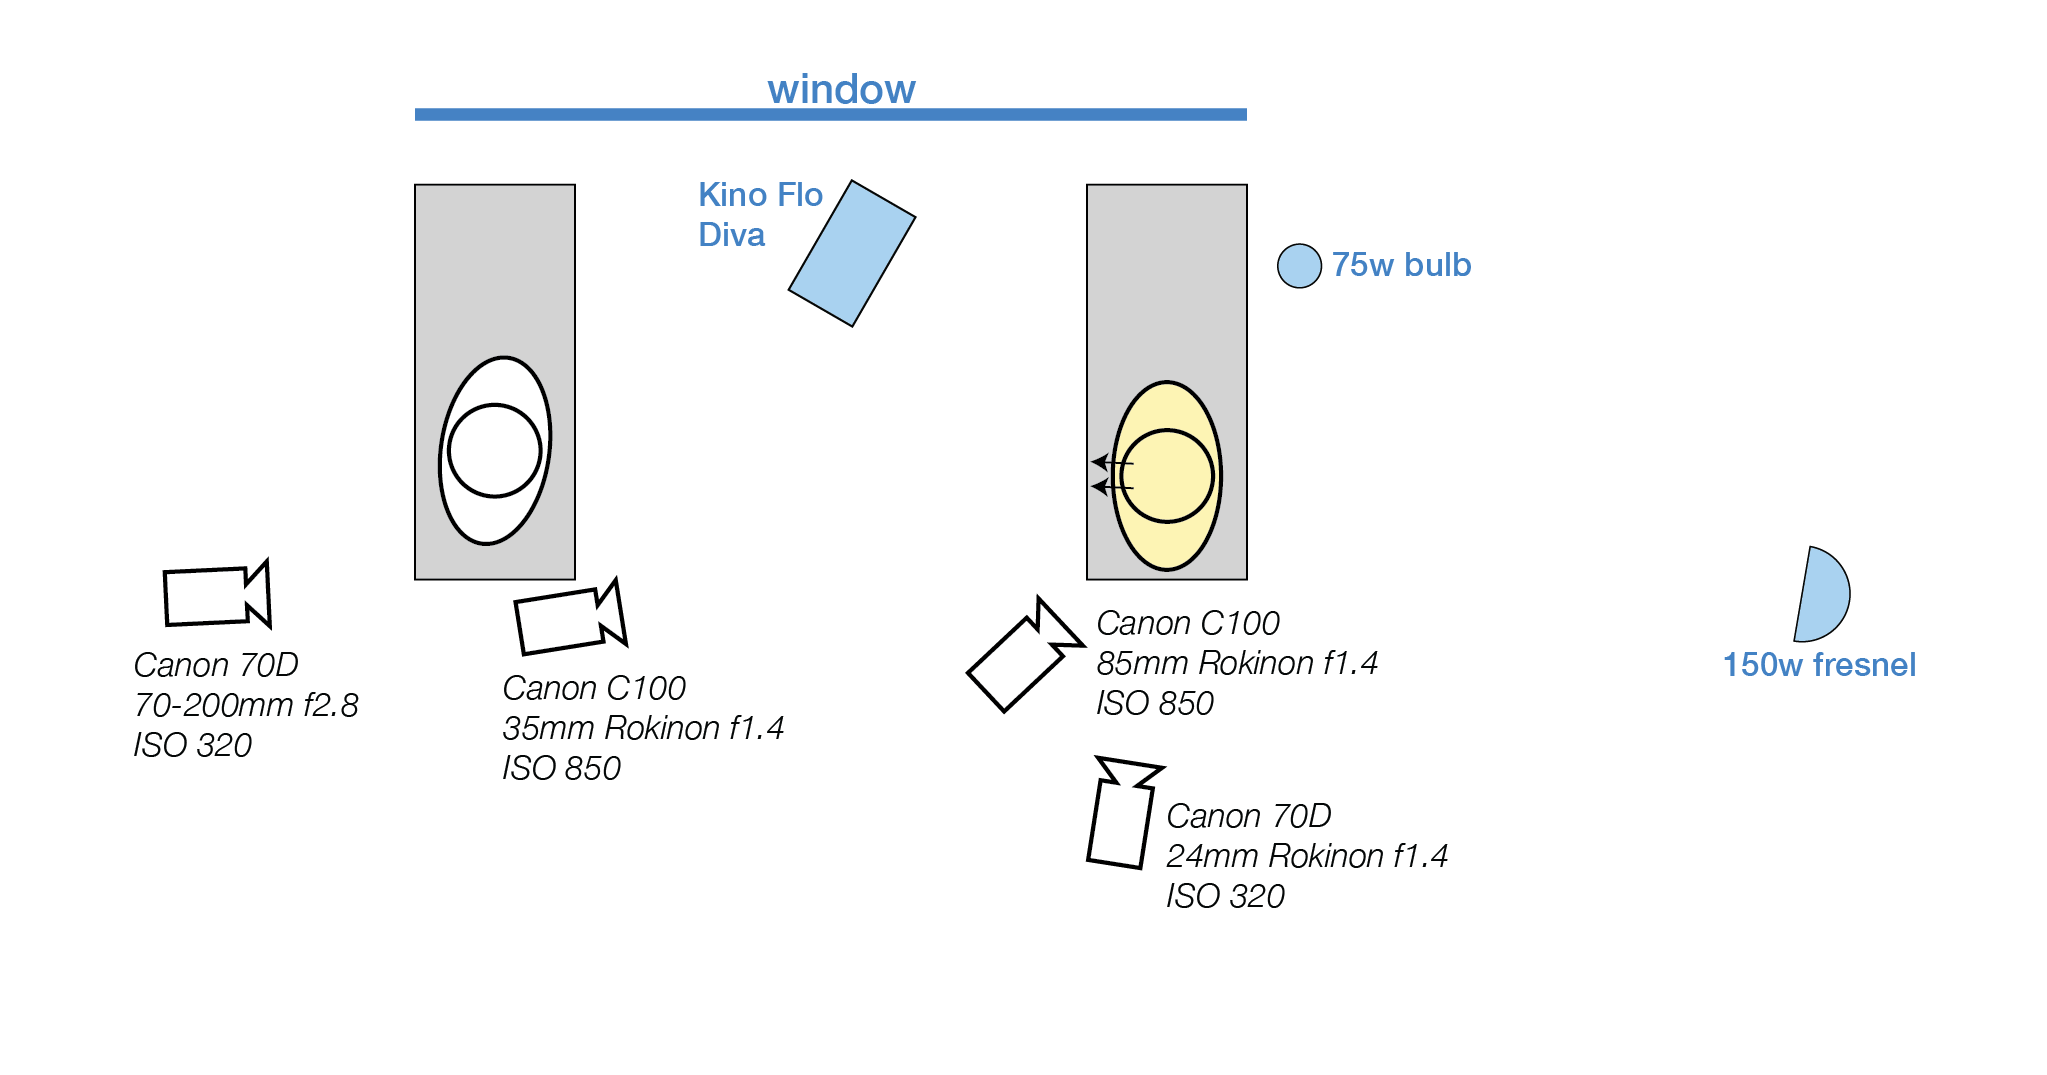
Once we had established the look and feel of interviews, it was just a matter of being careful to try and recreate similar looks for all of the other interviews, but to still try to set each character in their own world. This proved very difficult, because unlike Drummond, we never met any of the lawyers we interviewed until the second they walked into the room, so it was a complete guess as to what their energy or character was going to be on camera
As such, we took a lot of risks with our framing choices, in some cases this paid off, but there are plenty of examples where more prep would have allowed me to make different choices going into a shoot.
One instance where I felt my work could have been improved was on the Dan Webb interviews. The room we shot in had a very large table in the center of it, making camera and lighting placement very challenging. Unlike the other law firms we shot in, this particular conference room had smaller windows, so I began my setup based on the windows, and worked out from there.
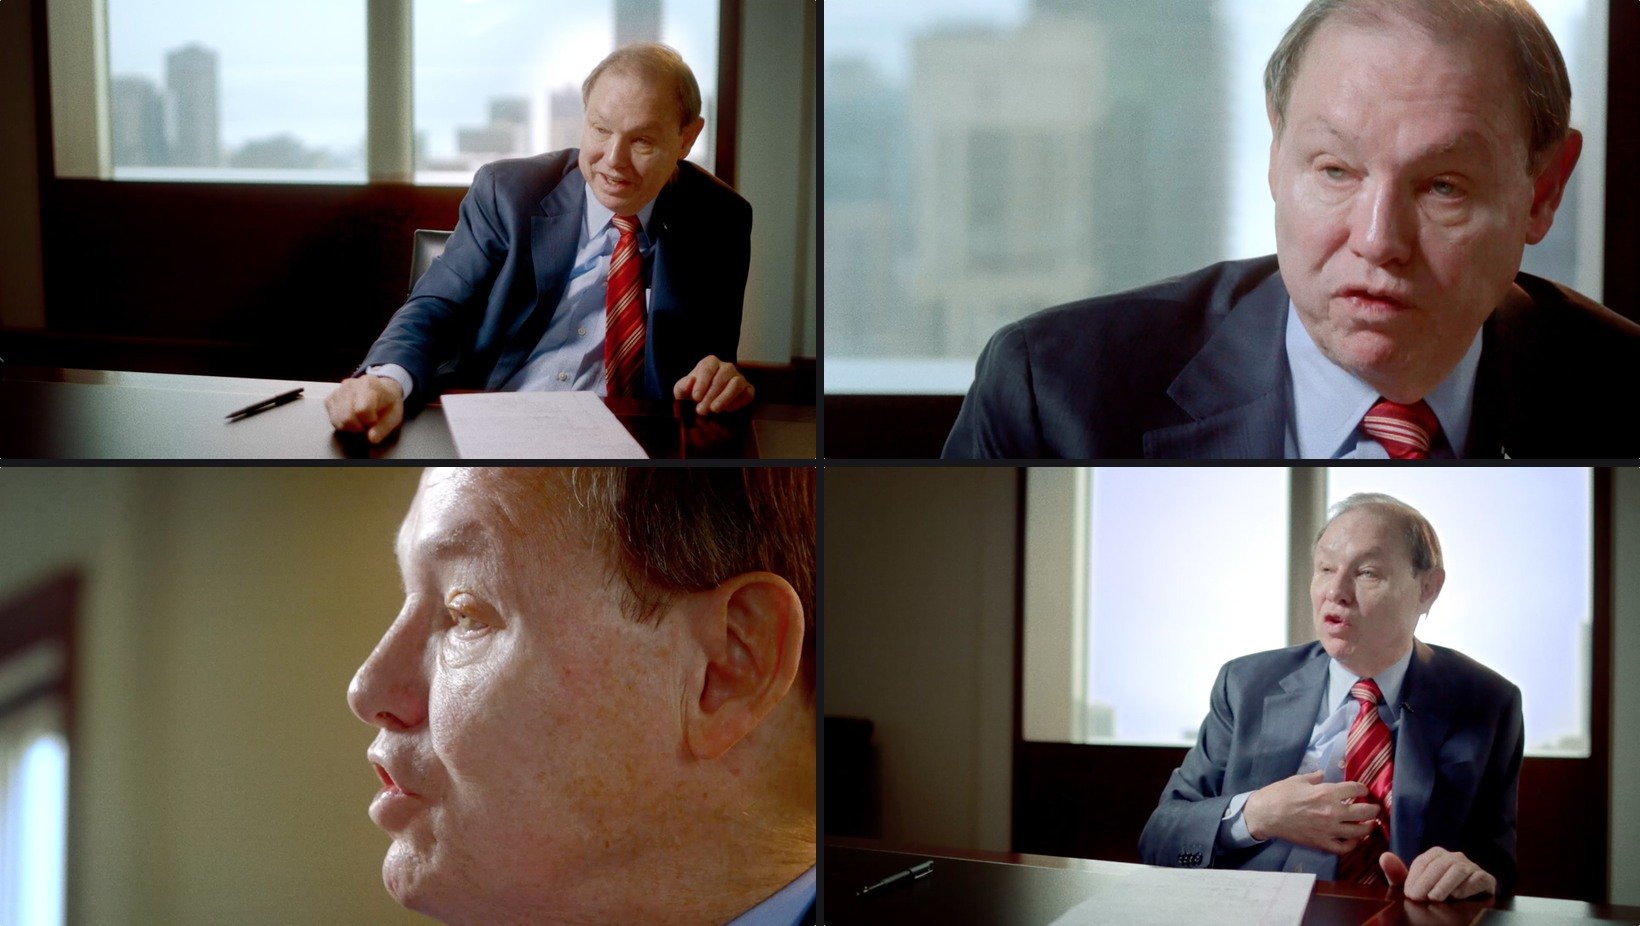
For me, the immediate problems with my setup are on the C-camera
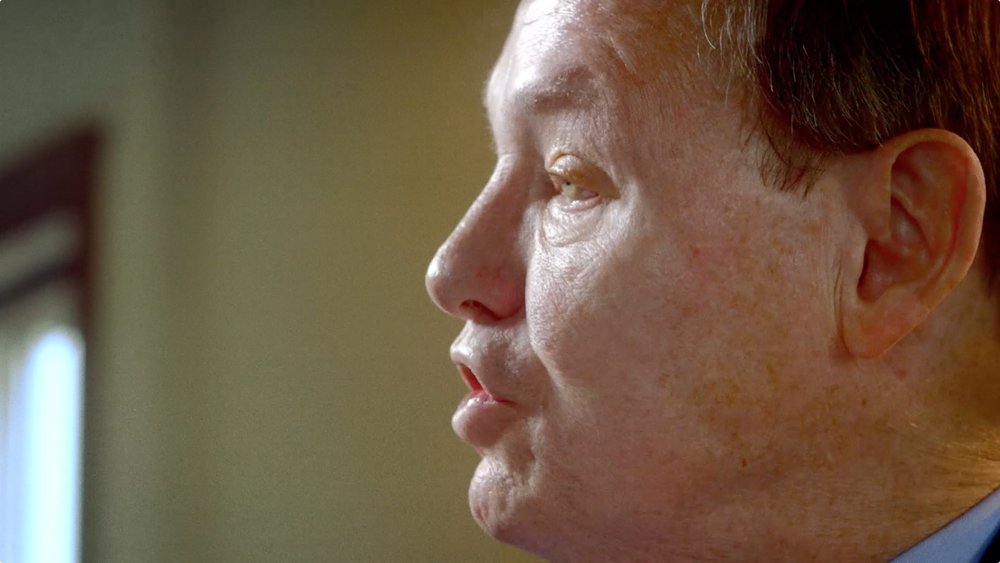
What's missing for me is his far eye. Instead of getting the sort of angle that we accomplished with Drummond from this vantage point, Dan Webb's head movement and general eyeline prevented his off-camera eye from ever making it's way towards the lens. A better example of how this shot should have looked can be seen here, in our interview with Mike Monico.
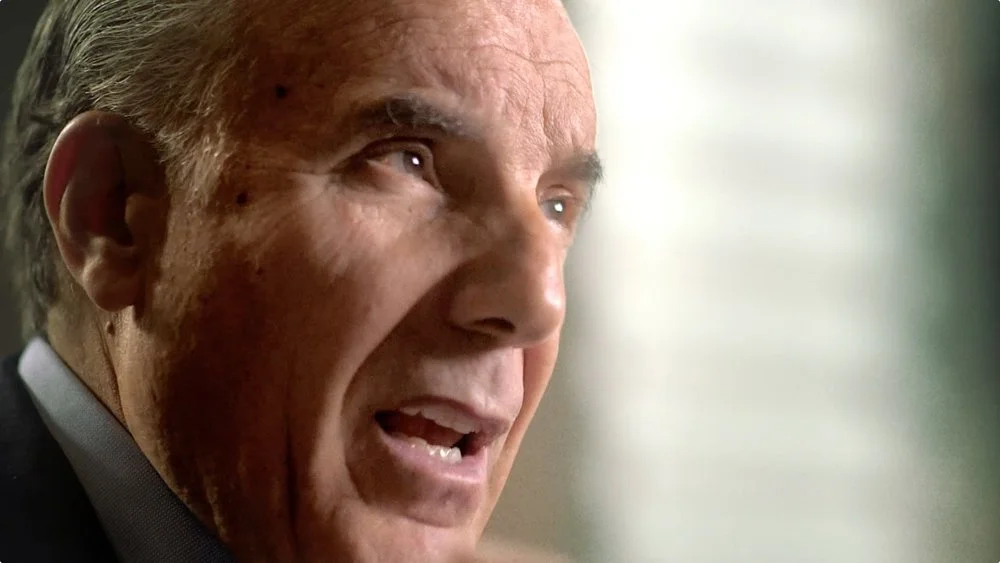
This is great! Both eyes are visible, with the eyelight from our key source, yet we're still below the subject, and pretty far off to the side. When doing interviews, there are a lot of things to consider during your setup. One thing that I often ask the interviewer to dois try to reposition themselves so that the subject naturally adjusts their eyeline to fit what the cameras are doing. This is usually just a matter of having the interviewer lean more to their left or their right during the interview.
Lighting
When thinking about lighting interviews, much like lighting a narrative film, I begin with the natural light in the room. Where is the light coming from? What makes sense for the situation? How can we augment the light without forcing too much change? I believe that the more natural you can make interviews, the easier it is for the audience to focus on the story, and not feel like they are watching something that was edited and spoonfed to them. Interviews, as they are, are already very deceptive with how much you edit out, and reword, I think adding to that a sense of fakeness in your lighting is one step too many in making sure the scene feels like it belongs in the room we’re shooting in.
Take, for example, this setup from our interview with Suzie Dineff.
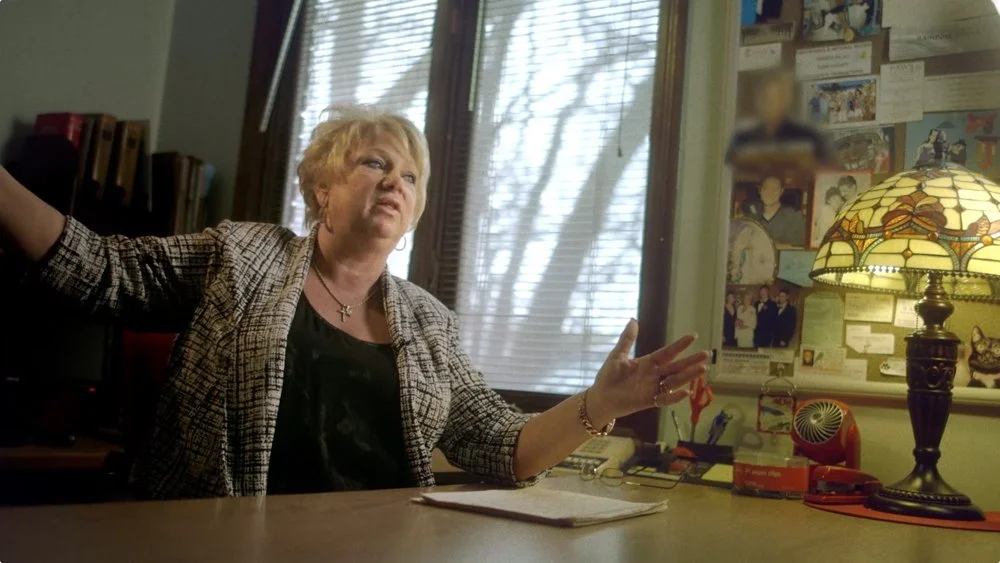
There are two main sources of light in her space, the desk lamp, and the window. Due to the fact that it was winter in the midwest, the sky was overcast and the general luminance of the outside was very dim, even in the middle of the day. So instead of forcing light through the window, I played the light as if the desk lamp was our main source, and the window light was wrapping and filling. The window did this for us naturally, and it only took a little bit of augmentation to build the lighting of her world.
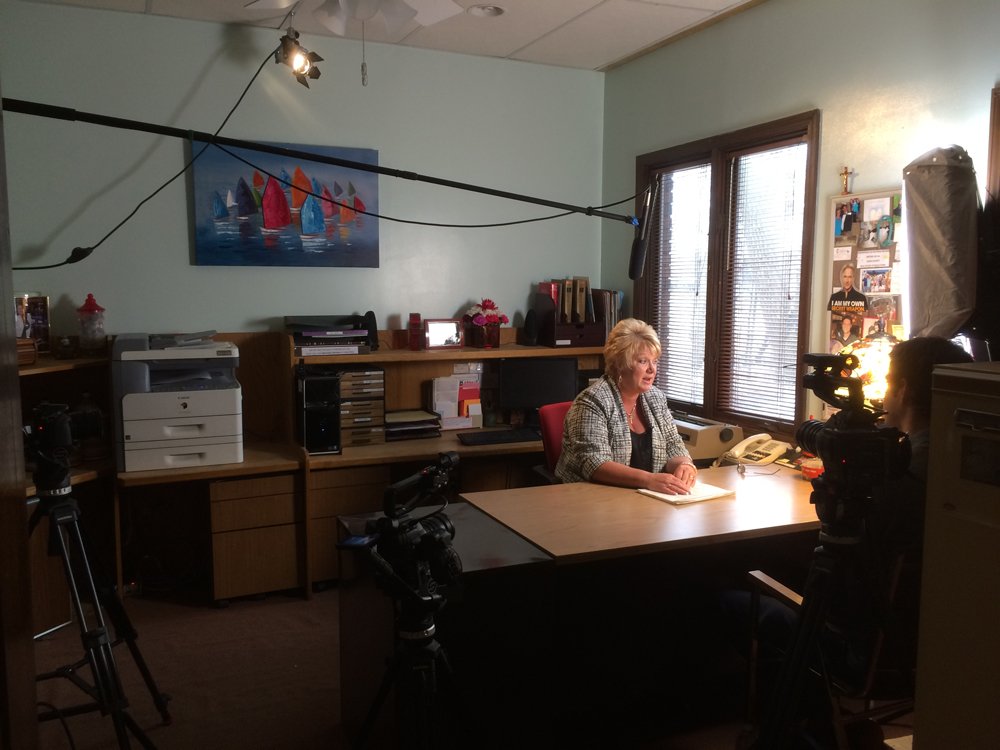
You can see on the far right our Kino Flo, doing a beauty key light from roughly the same space as the desk lamp, but being careful not to throw shadows from the lamp onto the wall or the subject. Again, the goal was to feel like that lamp was our main source of light.
As a backlight, I went with a 150w tungsten fresnel which I clipped to the drop ceiling to get the height and distance I needed from the source so that it didn't feel artificial. From most camera angles, this backlight felt more like a wrap of light from the window than a traditional backlight.
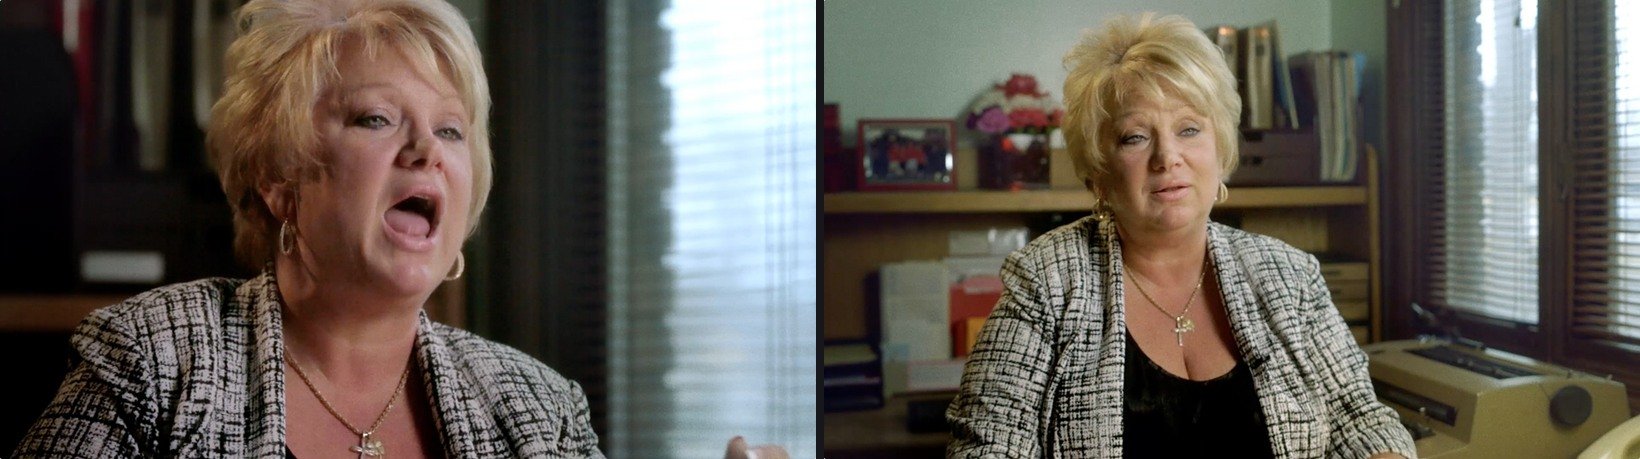
I know it's talked about very regularly on film blogs and taught religiously in film schools, but it's a tried and true method of lighting- start with the practical environment and base your light off of what makes sense in the location. One of my favorite lighting scenarios on Greylord was with Tom Sullivan.
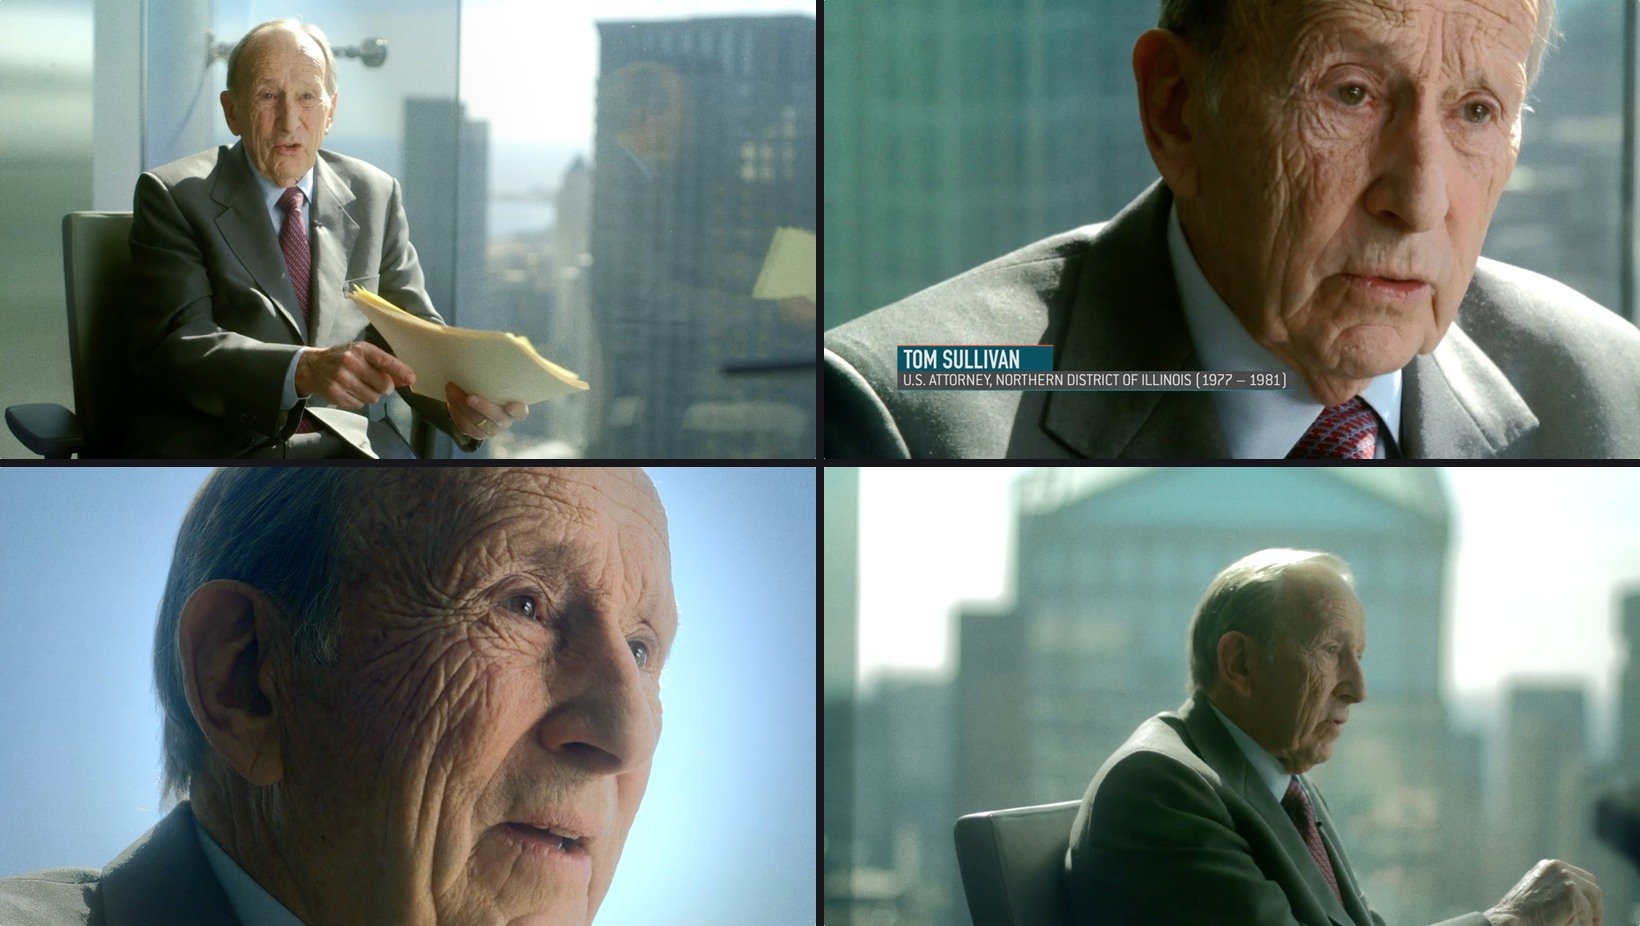
In this case, most of the light is coming from the outside, with the sun being behind him and almost directly overhead. This setup basically built itself, we had the sun already in position when it came time to shoot, so a natural backlight was already built into our scene. All that we needed was enough light coming from the camera right side of the scene to build up his exposure enough that the background didn't completely blow out.
This was accomplished by setting up two naked Kino Flo Divas next to each other. What I like about this technique is that it naturally creates a very unique eyelight on the subject. By using so much light on the subject to combat the light in the background, the eyes begin to reflect very interesting patterns. In the case of Sullivan, his eyes have a sort of double light, from my two Kino's stacked together.
B-Roll
Macros
For me, documentaries are a chance to experiment with different techniques, much like a music video. As long as the visuals you design support the story you are telling, there's no rules about what you can and cannot film, and how you film it. I'm often using documentary b-roll as an opportunity to try out new things.
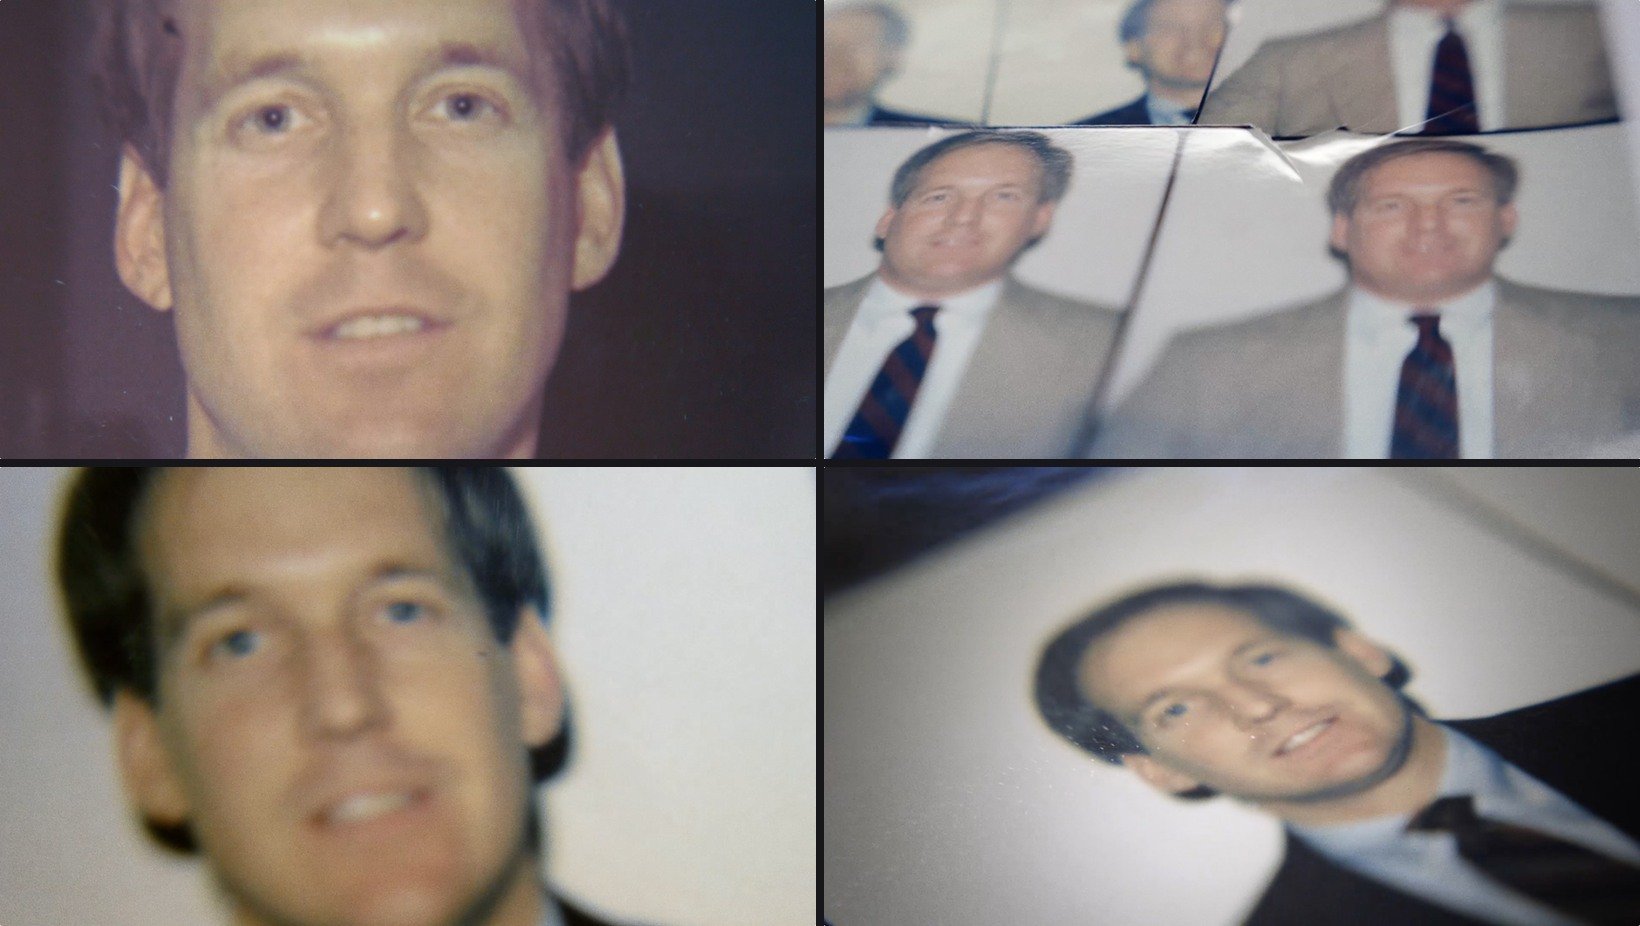
I was in the middle of working on another documentary in which I used a macro lens to film a close-up on a document when Greylord came about. It was just one shot, but the experience there informed many of my decisions on Greylord, which contains footage of handfuls of different documents and pictures.
Of course you can always take documents and pictures and scan them in, then animate in After Effects, but for me, if it's something you can do with a camera and a lens, that's always better. I like the almost broken feel of shooting something up close, the natural blurry edges, unintentional focusing adjustments, and the physical feeling of a camera operator trying to keep a macro shot steady.
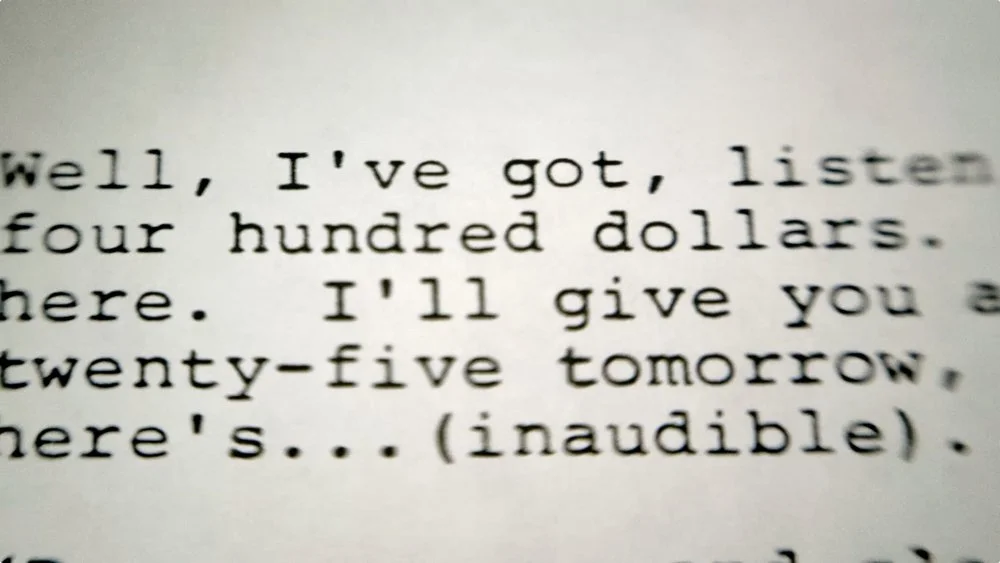
What I use for my macro work is the LensBaby Spark, which comes with two Macro lenses, and a wide angle and a telephoto adapter. With the telephoto adapter and both Macro lenses screwed on, I literally have to press the lens against the object to get focus, so I can be pretty close if I need to be.
For most of the documents and pictures that appear on screen in Greylord, we used macro lenses. In some cases I was just by myself in a small room with a black piece of foam core and a 650w light with a chimera on it shining down, but for a small handful of shots I was able to enlist some help to make sure that I was hitting my framing if I needed to pull off a complex pan, or to physically move the paper or pictures for effect.
The other set of macro images that we produced were of the Nagra recorder and the Beta tape machine. These were done on a tripod and a slider, rather than focusing on handheld. I knew that in the story we'd be seeing a lot of this footage more than once, so it was important to find tons of unique angles of the same action so that while the action was the same, the shot itself was not.
The macro lenses on the LensBaby Spark were too complex to use for this because you have to physically hold the LensBaby in place to achieve focus, and it causes it to shake and stutter, so I went with a more traditional approach. However, I still found that I wanted to deform the image in some way, so I found some old screw-on lenses that I used to use with my old Sony PD-150 when I first began doing videography work. These lenses are great for shifting the focus, and they fit on pretty easily with some tape
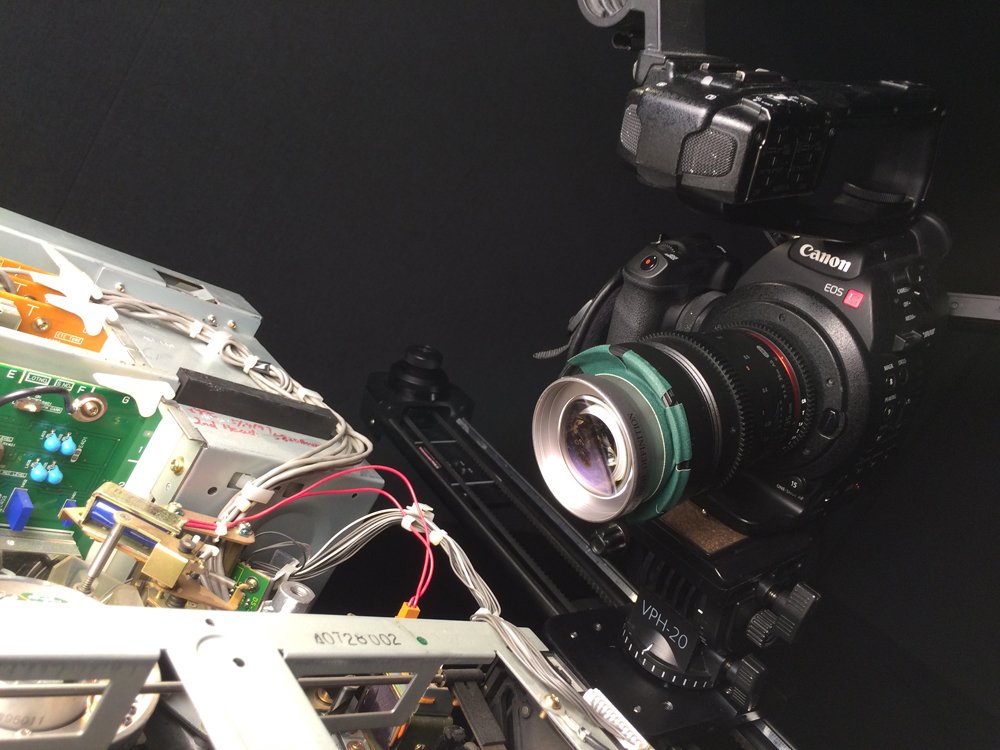
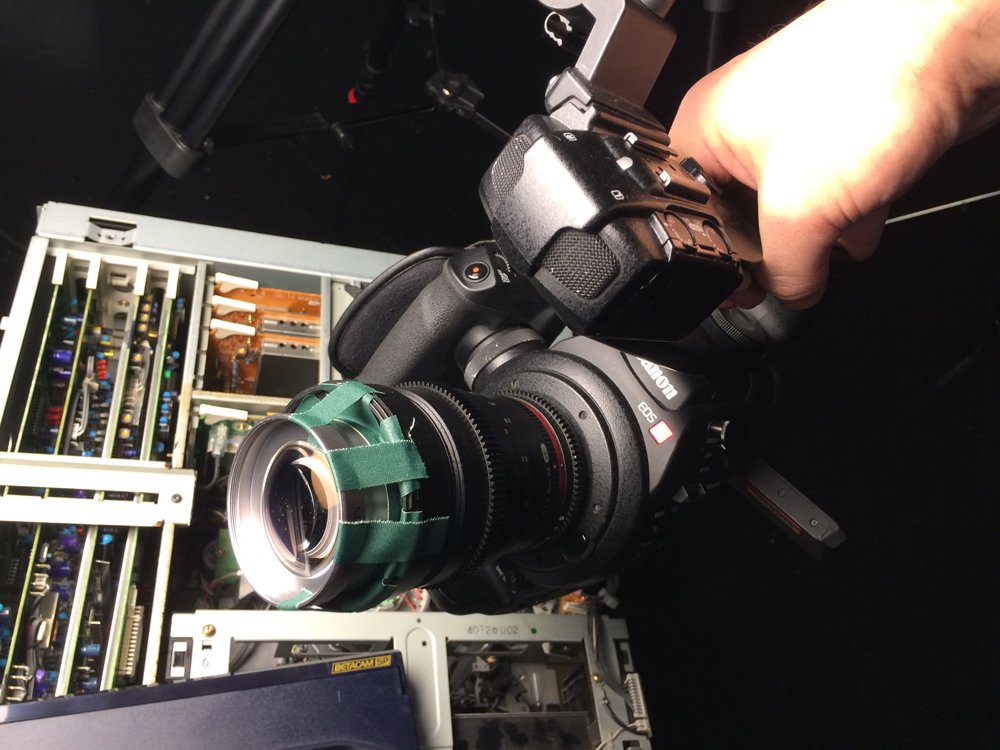
With these lens adapters, I was able to get macro style shots using my regular set of Rokinon Cine Primes on the C100 body.
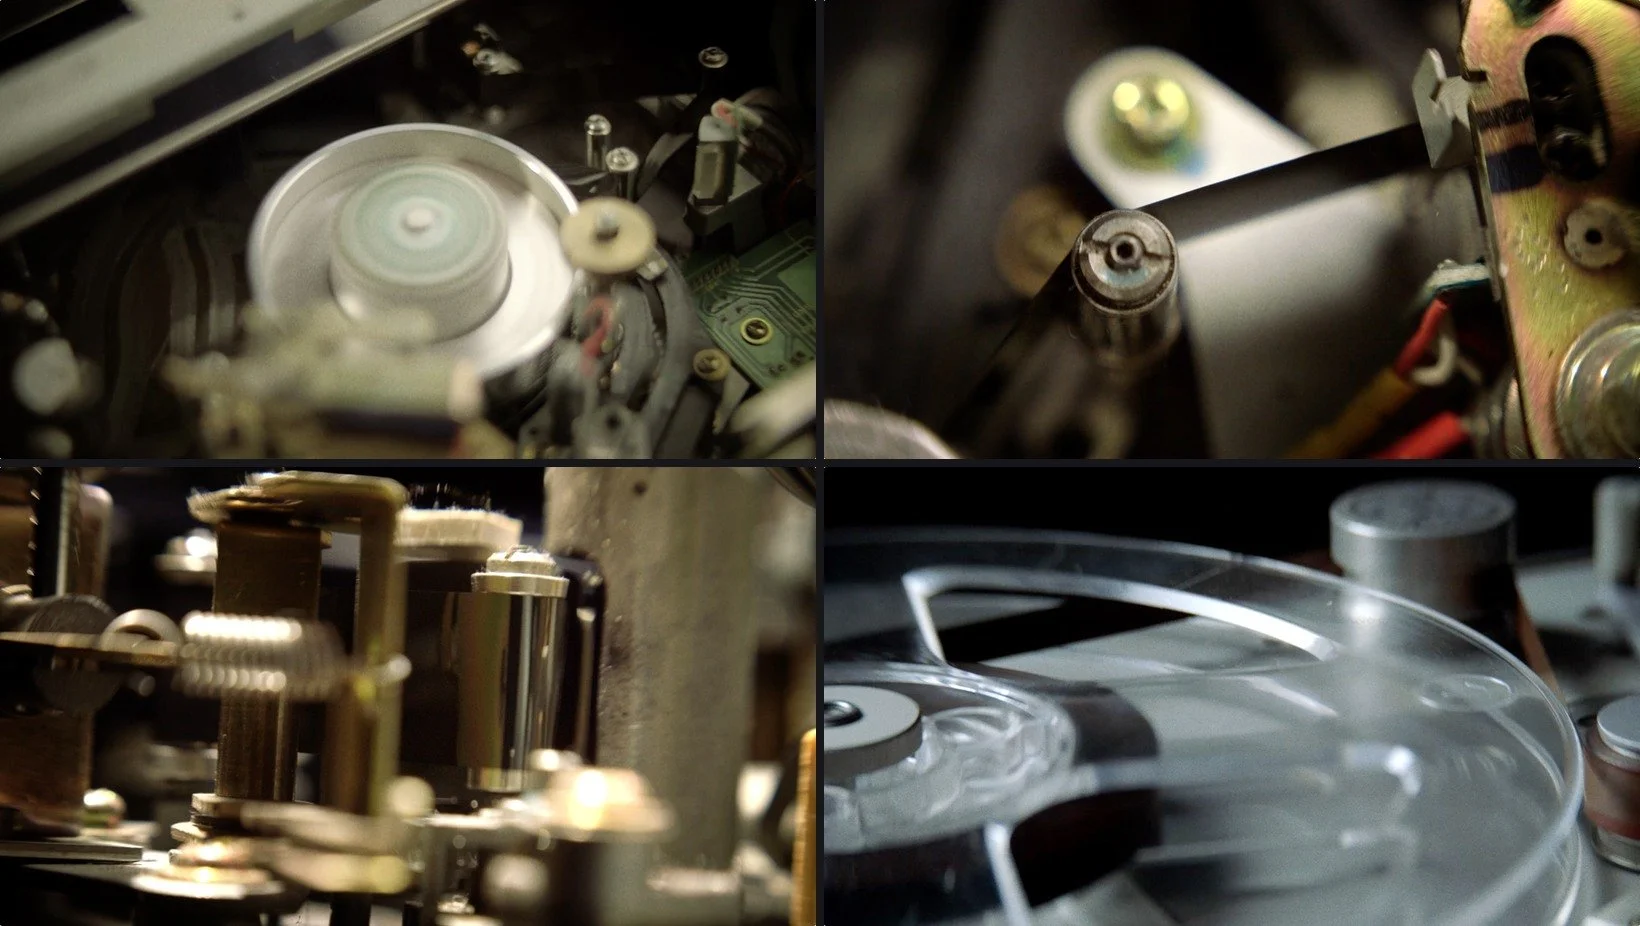
When thinking about lighting macro shots like this, the best thing that I've discovered to do is to setup a very large and very bright backlight source. I’m using a 650w tungsten fresnel with a chimera on it. A 100w light is then dropped around to various places to bring up the details, putting those little hits of light where they make the most sense on a shot by shot basis. The backlight creates hot edges to most of the objects, so there’s quite a bit of shape and texture in things that might otherwise look pretty flat.
Intention
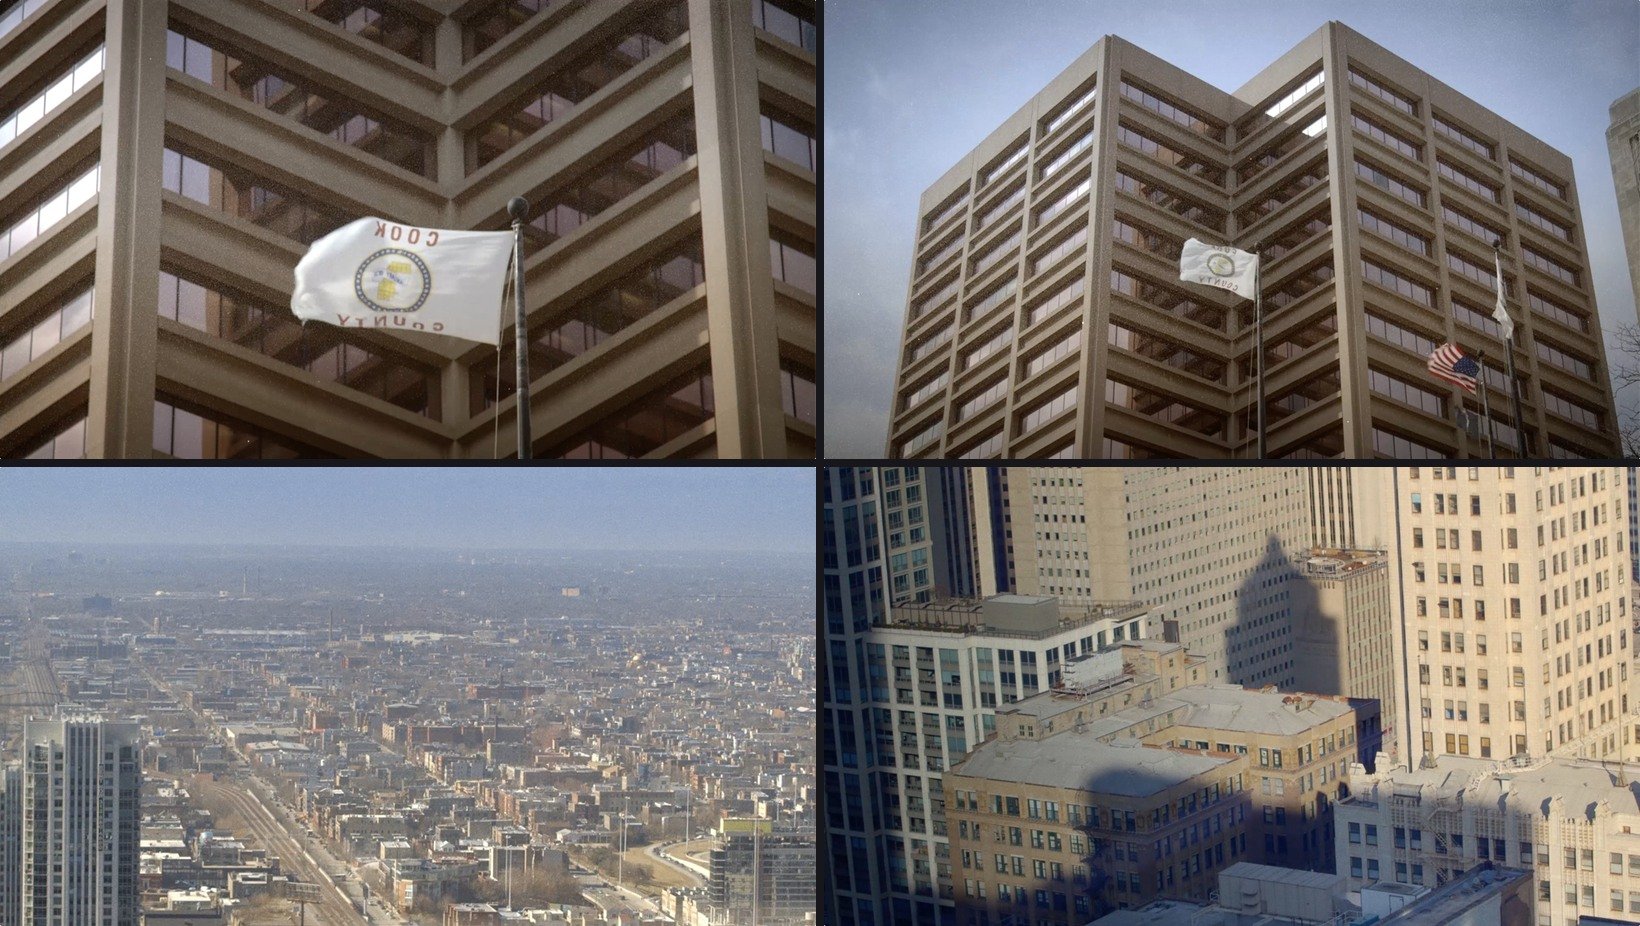
The other half of the coin on b-roll is all the stuff you need to shoot to establish a place. Exteriors. Personally I'm not a fan of shooting exteriors, with limited resources or control over an environment you quickly discover how difficult it is to get good, compelling footage of a building.
That being said, I felt that it was important for our establishing and exterior to shots to have a sense of intention to them. The shots needed to do something and say something, and not just feel like I stood at the corner and panned up the building. I wanted to stay away from anything that felt like it belonged in a news broadcast.
Take, for instance, the Dirksen Federal Building.
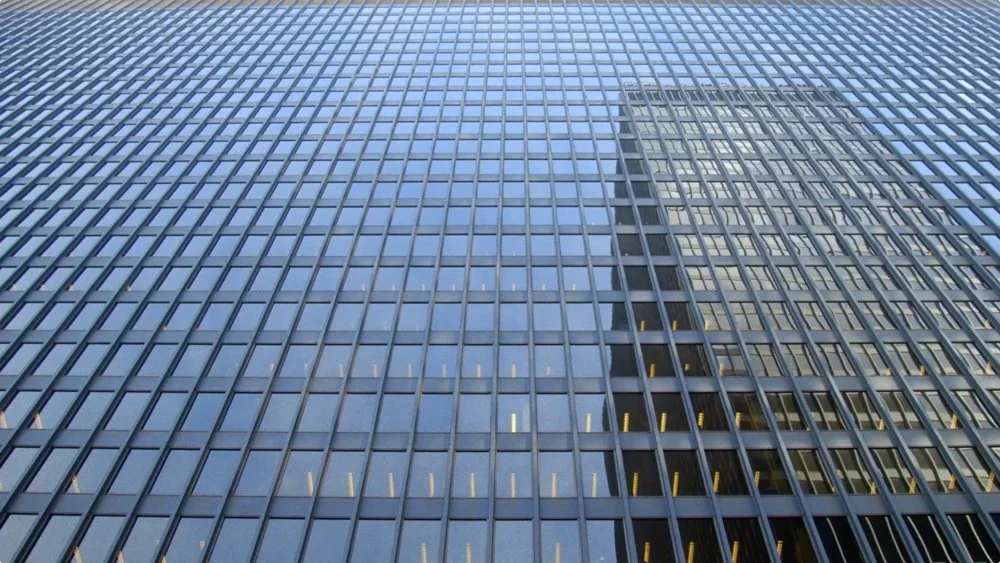
I went with an angle that let the building fill the frame and put the emphasis on its lines. At this point I already had an edit in place, and knew what all of the rest of my footage looked like, so a framing like this just naturally fit the story. Something that I often forget while filming exteriors is that unless you need to know exact geography, you can be very inventive with the choice of angle and the way a building fills the frame.
Something You'd See in a Movie
This won't be the last time I mention this I'm sure: I'm always trying to setup and light shots to look like something you'd see in a movie. If it doesn't look like a shot you'd see in a movie then you need to rethink it. We all watch movies, so you know what a movie looks like, and chances are you've seen a news broadcast, so you know what that looks like. If you are new to filmmaking, or you are making a documentary but are not a visual artist or have a background in cinematography, then the best thing you can do is to simply steal things that you've seen done that you thought were great.
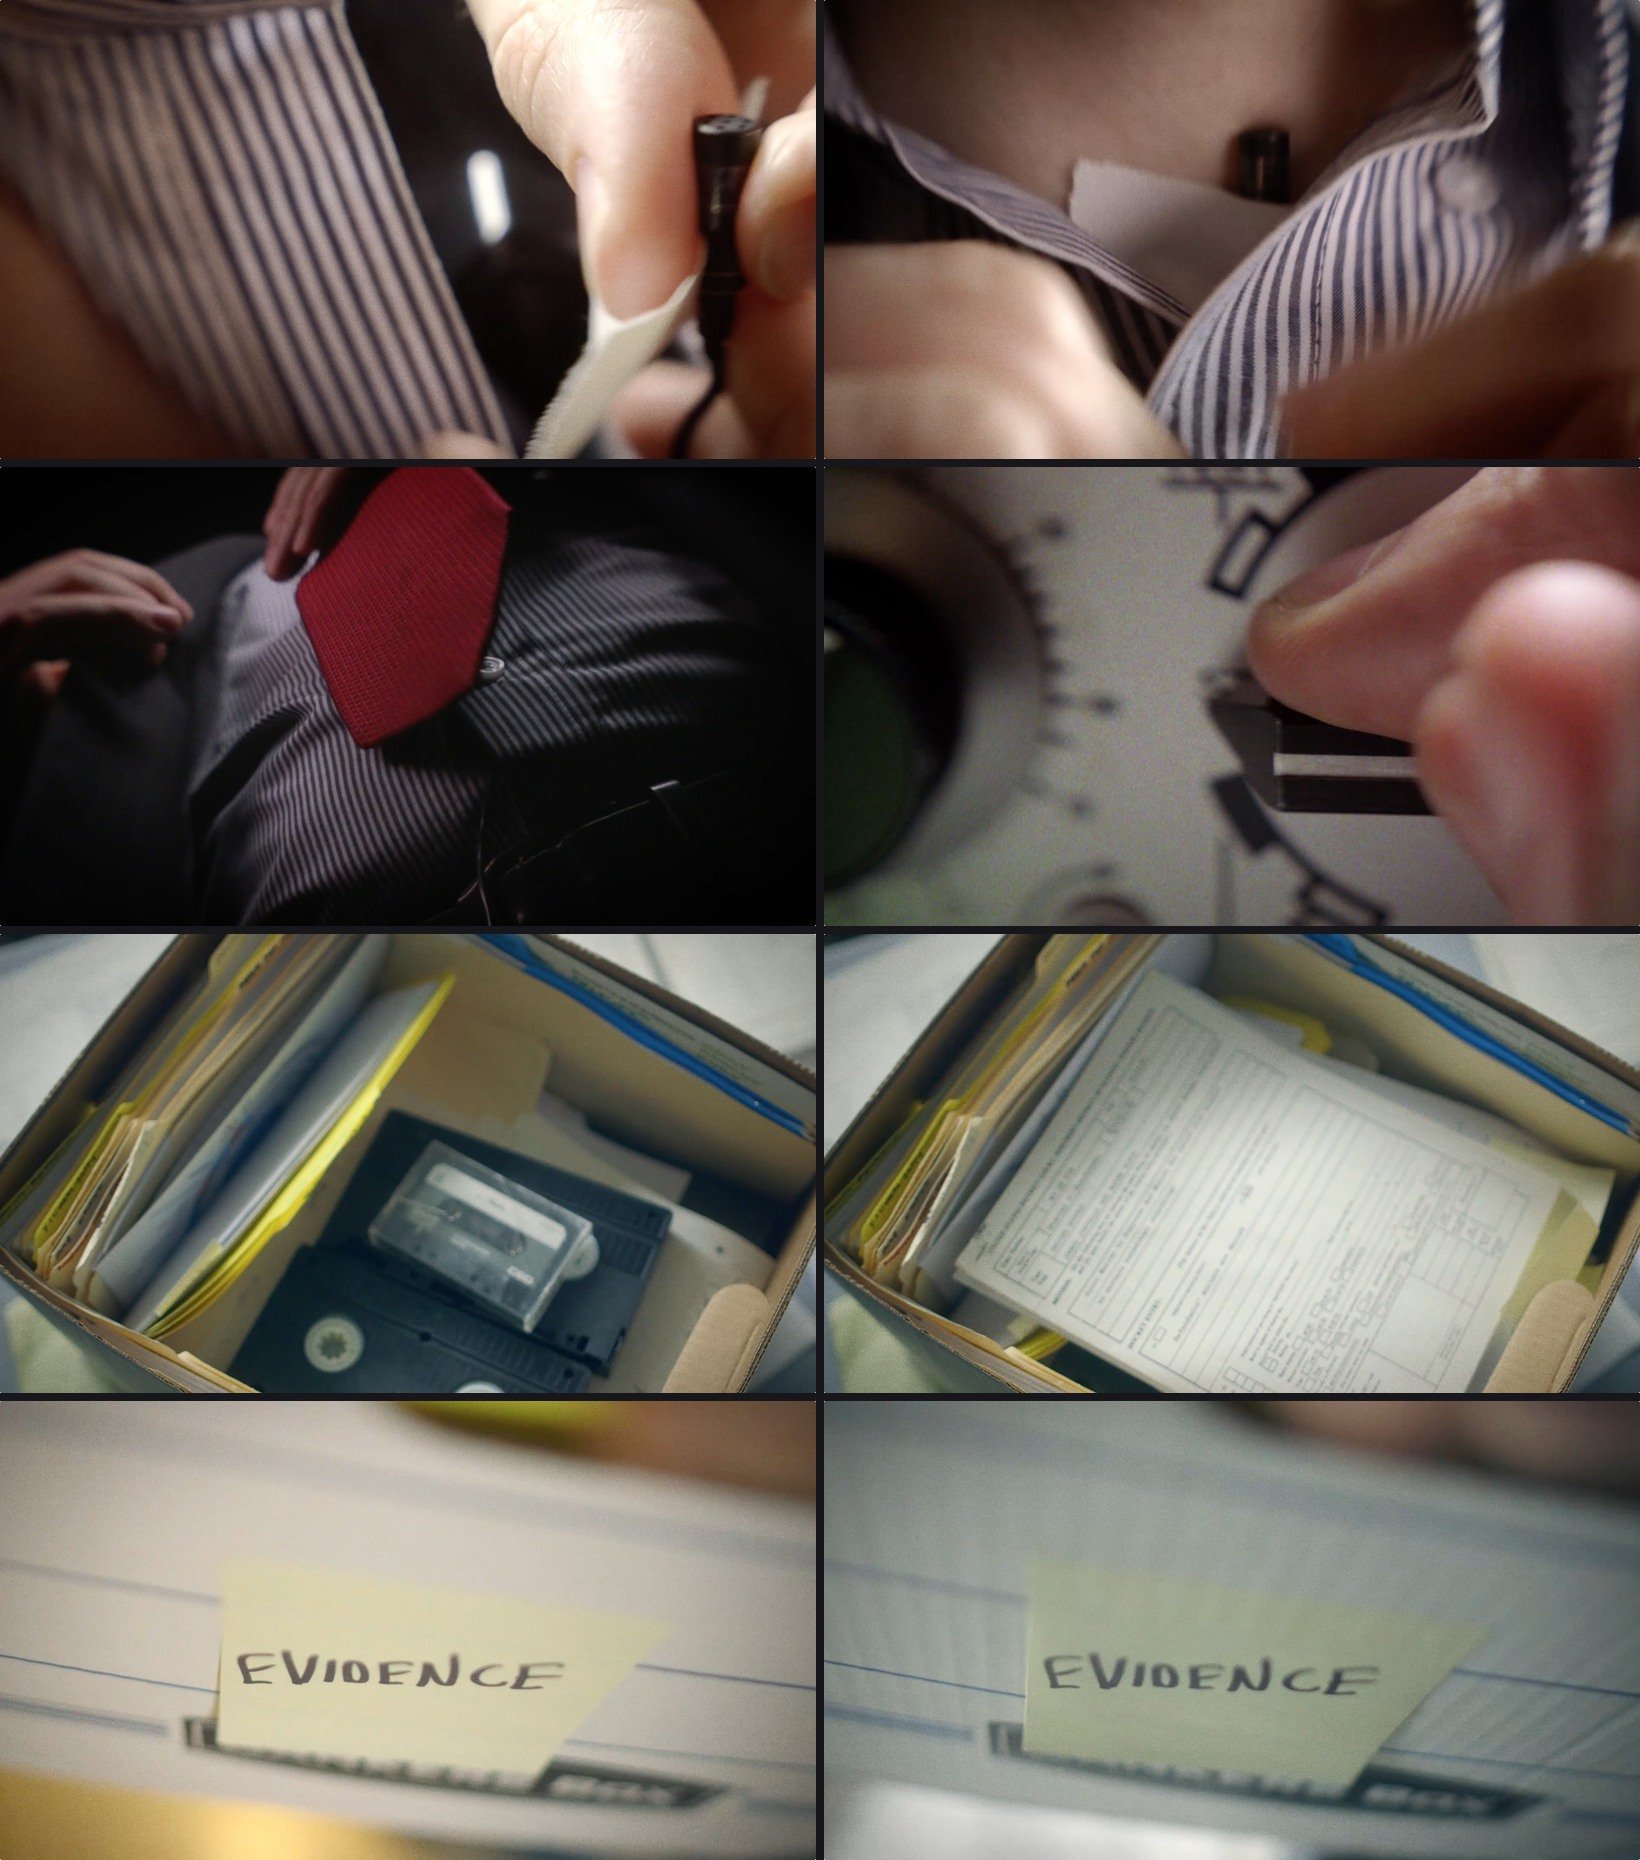
With the close-ups of the wire and the evidence, I wanted the framing and the light to do some of the storytelling. Otherwise they could easily feel like something you'd see on the news.
I followed all of the rules I had already established, a physical camera operator, super tight framing, contrasty heavy backlight, but more than anything I always tried to set up the frame to feel like this was a shot you could see in a movie.
Archival Footage
In addition to all of the practical documents we had access to we were also provided with a large cache of archival footage. Most of the footage was shot either on SD tape in the 1980's, or shot on film, then converted to SD tape, stored, uprezzed and sent to us as a link, so there was no chance of getting good HD quality footage, not to mention that most of the footage itself was in a 4:3 aspect ratio instead of the now standard 16:9. Instead of pillarboxing the images, I decided that it would fit the story to take all of our archival footage and film it off of a TV set that you might have seen in the 1980's.
We found an old TV, and connected an old DVD player to it. I was able to very quickly save all of the archival footage onto a DVD and play it back on the TV, with a Canon C100 pointed at it. I chose to shoot with the 35mm Rokinon Cine Prime with the f-stop opened all the way to a 1.4 so that the edges of the image would start to degrade and soften, especially as the slightly bent screen bowed away from the camera and left the very shallow plane of focus.

Graphics
To keep the graphics in the same world as most of the b-roll, I suggested to the graphics team (Caylin Younger and Ollie Mamaril) that we use actual handheld tracking data on the 2D and 3D graphics to give them a more grounded feel.
The result feels like actual handheld footage, but with the visuals being computer generated animations. One example is this board, a prop we couldn't create as convincingly on our own, so we did it in 3D:
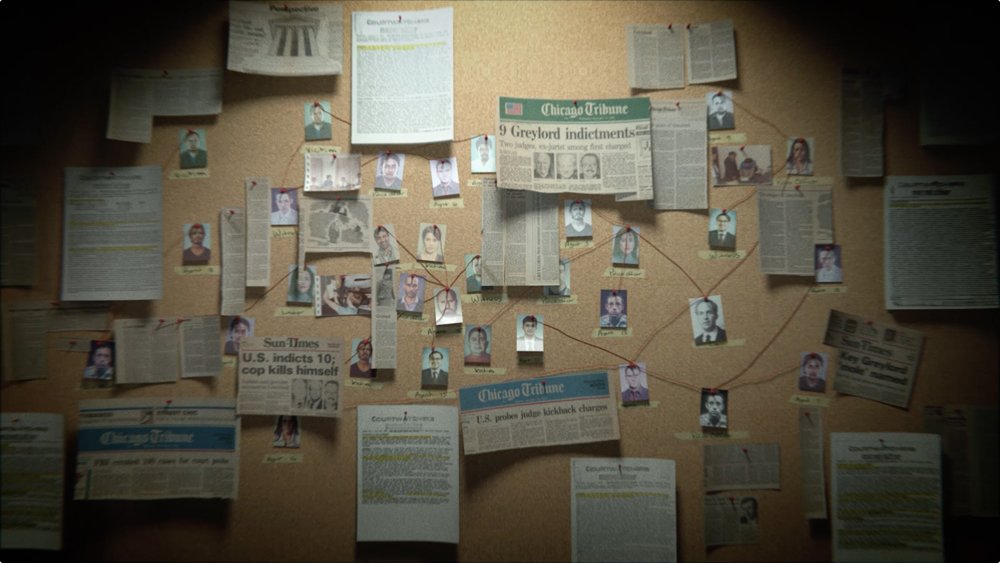
Just like my approach to pictures and documents, whenever possible if you can add in as many real-life assets to your 3D scene as possible, the result will feel more realistic and less fake. In this case, the camera move is entirely created by hand, tracking boxes on a wall that I filmed with a handheld shoulder mounted camera, and the data is then ported into Cinema4D where the layout and design is built and rendered
Noise
The entire movie has a layer of noise on top of it. This is added last, after the graphics, after the color correction. We used noise from two different packs, one from CineGrain and one from Gorilla Grain. The Gorilla Grain 35mm Fine was perfect for the majority of the project, however, for many of the graphics, or old stills, I went with the 16mm stocks, or used dirt and scratch options from the CineGrain packs.
The idea here was to finish a product that didn't feel like a video, and would have a look that reminded you of something you could see theatrically in the late 80's or early 90's, when film stocks weren't as fine and grain, noise and dust was more apparent.
Final Result
The final result is a piece that I'm very proud of. I think there are plenty of mistakes to learn from in this process, but on the whole, this feels like a very complete, very grounded documentary that all fits together, and feels designed with intent, and professionally produced. I'm often judging my own work based on what I see other people doing, and I'm often wondering if I've made something that holds up to work that I look up to myself.
I don't know that I'm necessarily achieving all of my goals, but I do feel like this looks like a movie that you could see in the theaters, so I'm excited to unveil it.